 I took advantage of a break in the rain that had been falling most of the day to get out and break in my new lenses. Luckily for me, the break in the rain happened at 4 o'clock, which just happens to be when the sun starts setting at this time of the year. This lead to some 'golden' light.
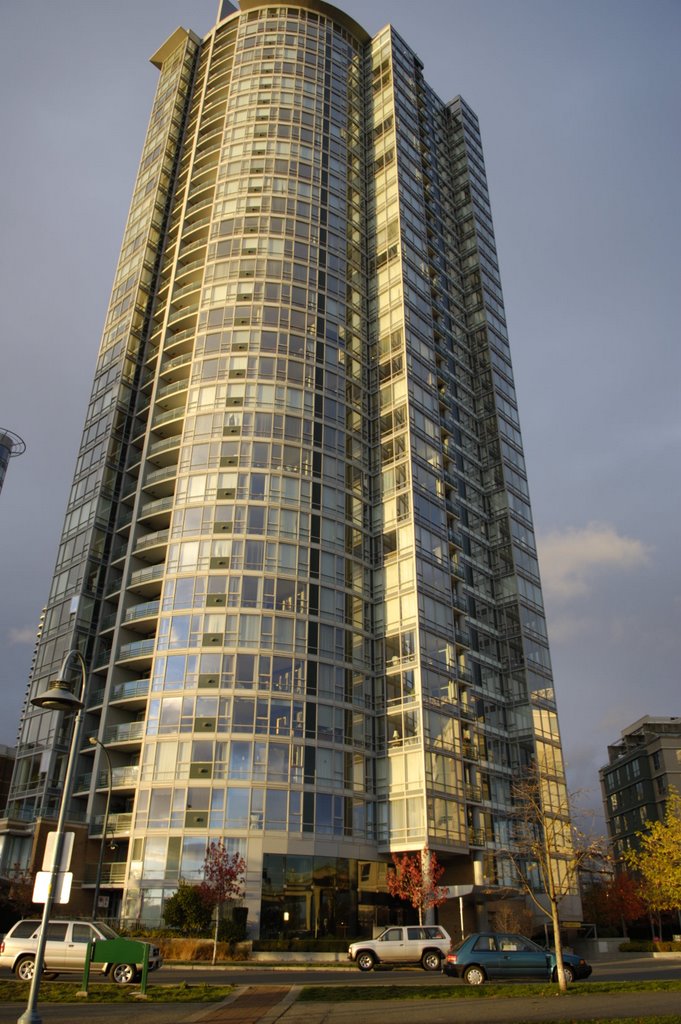
On the left is my apartment building taken from the park (called Cooper's Park) across the road on the waterfront. My place is on the 22nd floor, and the building has 39 floors, so count down 17 from the top to work out where I am.
Whilst the light was warm and golden, it was actually freezing and the grass in the park was muddy and squelchy.
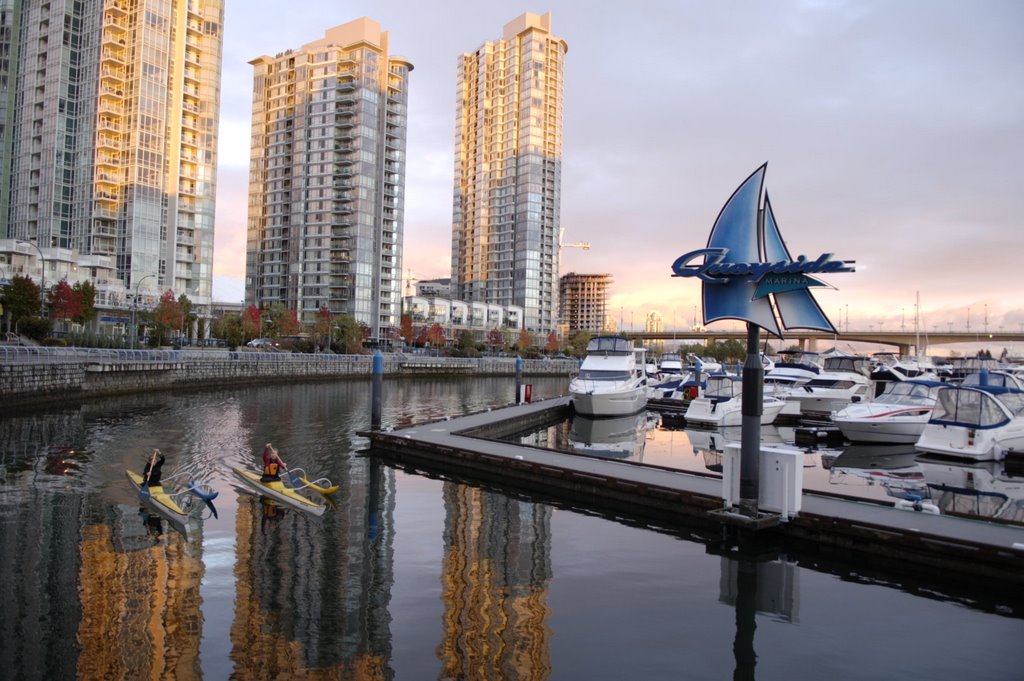
The picture below was taken looking back from the marina towards my apartment building. Mine is the tall one on the right.
Kayaking along false creek is quite popular and I intend to give it ago when the weather warms up. I like the effect of the dusk light on the buildings and their reflections in the water. The two kayakers happened to come past as I was taking the shot.
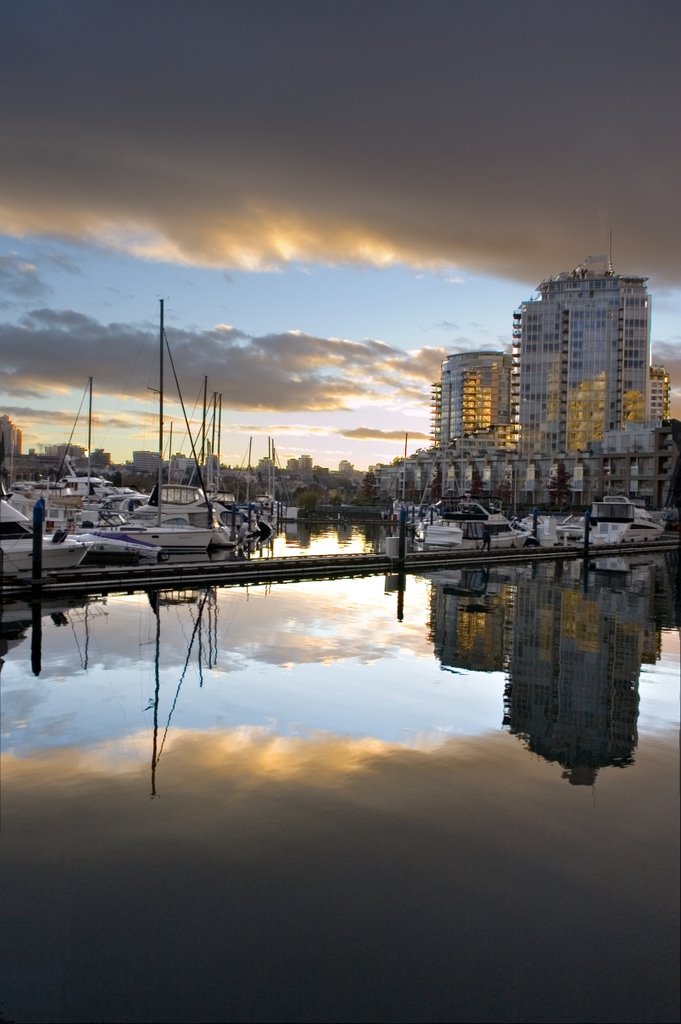
This last photo was taken from in front of the first tall apartment building in the last photo. Looking out over the marina towards the sunset. This photo is actually a bit of a 'cheat'. I used Photoshop to make it what is called a High Dynamic Range (HDR) image. The dynamic range of a camera (both digital and film) the range from total brightness (ie total white) to total darkness )black) that its sensor (digital) or film will capture when exposed to light. A camera's dynamic range is not a large as your eye's, so you'll find that when taking a photo in conditions where there are both brightly lit and shadowy areas that your picture won't come out the same way as you saw it with your eyes. The photo will either show the areas in shadow properly and make the brighter areas appear as bright white, or the reverse, where the bright areas (such as a cloudy sky) look right, but the shadow areas are black, or near black. Normally to make a photo that shows both the light and dark areas properly, you need to take a number of separate photos (say, three): one exposing for the shadow, another exposing for the bright scene and a third somewhere in the middle. You can then use a piece of HDR software to 'merge' the three photos into one image exhibiting a greater range from light to dark. In the case of this photo, I took one picture in RAW format (this is important) and adjusted its exposure in Photoshop and saved it. I did this twice: once adjusting so that the bright area (the sky) looked correct and then again so that the darker foreground looked correct (or at least, better). Note, when I took the photo, I was exposing so that the sky looked correct. This gave me the following pictures, exposing for the sky on the top and for the shadows on the bottom.
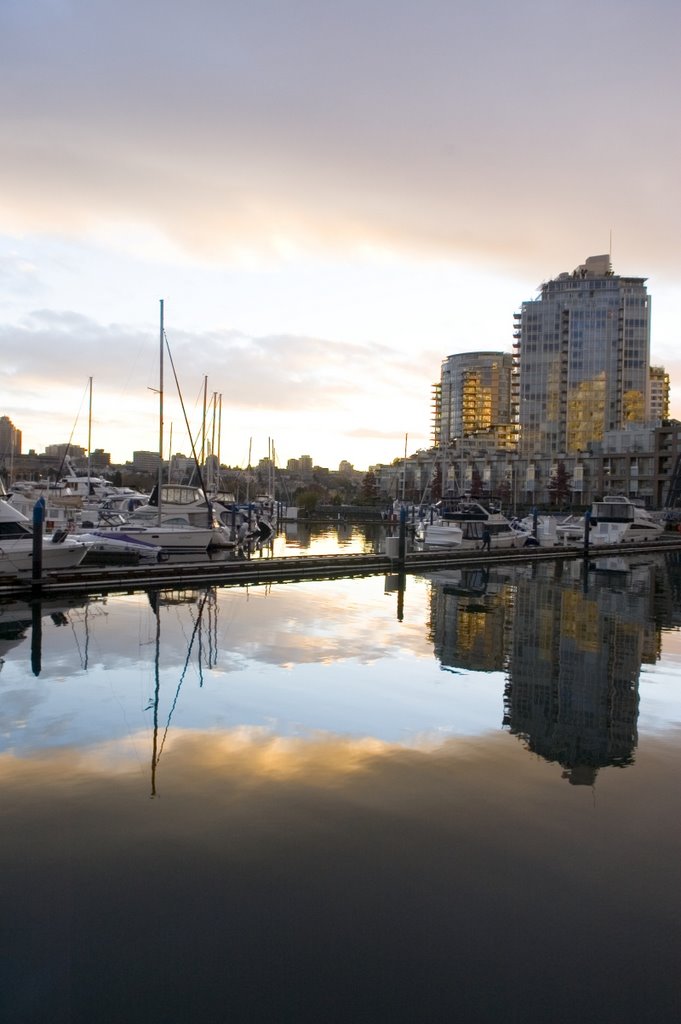
I opened both images in Photoshop and 'dragged' the lighter one on top of the darker once (creating another layer on top). Then just used the 'magnetic lasso' tool and selected around the skyline and the bottom of the picture. Then just inverted the selection so that the 'blown out' sky was selected and then 'cut' it to get rid of it, exposing the correctly exposed sky below. Voila! Basically done. Did some other minor retouching to rectify some of the areas missed when selecting the sky. If you look closely, you can see a smudge in the sky above the tall building on the right. This is due to some sloppy cloning on my part when cleaning up. Spending more time on it would have done a better job.
Class dismissed.
2 comments:
tims handy hint #124
T-Mac! Providing us with inspirational (and handy) information once more. Bravo!
Post a Comment